The Environment TAB has a few TABS of it's own.
Options Environment Editor

OPTION |
DESCRIPTION |
Auto Indent |
When you press return, the cursor is set to the next line at the current column position. |
Don't change case |
When set, the reformat won't change the case of the line after you have edited it.
Default is that the text is reformatted so every word begins with upper case. |
Reformat BAS files |
Reformat files when loading them into the editor. All lines are reformatted so that multiple spaces are removed.
This is only necessary when you are loading files that where created with another editor. Normally you won't need to set this option. |
Reformat code |
Reformat code when entered in the editor. The reformat option will change the modified line. For example a = a + 1 will be changed into : a = a + 1 . When you forget a string end marker ", one will be added, and endif will be changed into End If. And finally, ? is changed into Print. |
Smart TAB |
When set, a TAB will place the cursor to the column where text starts on the previous line. |
Syntax highlighting |
This options highlights BASCOM statements in the editor. |
Show margin |
Shows a margin on the right side of the editor. You can specify the position. By default this is 80. |
Comment |
The position of the comment. Comment is positioned to the right of your source code. Except when comment is first character of a line. |
TAB-size |
Number of spaces that are generated for a TAB. |
Key mapping |
Choose default, Classic, Brief or Epsilon. |
No reformat extension |
File extensions separated by a space that will not be reformatted when loaded. For example when DAT is entered, opening a DAT file can be done without that it is reformatted. |
Size of new editor window |
When a new editor window is created you can select how the windows will be created. Normal or Maximized (full window) |
Line Numbers |
Show line numbers in the margin. |
Show Subs/Labels |
This option will show sub modules/functions and labels at the top of the editor window in a drop down box. To get more screen space you can disable this option. |
Remove Empty Lines |
This option will remove empty lines when you paste data from the clipboard into the editor. When you copy & paste text from the help file (or any other source) you will find that windows inserts empty lines. This option will change two CR+LF into one. |
Indention
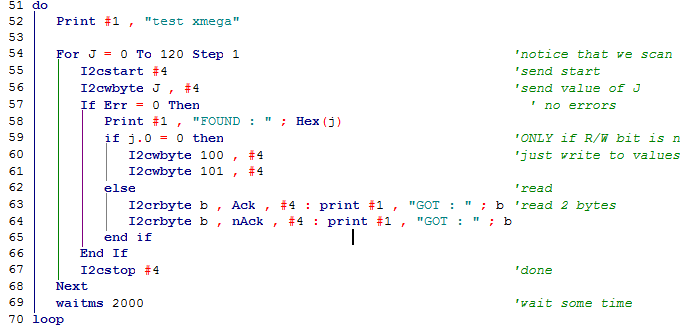
When indention lines are drawn, you can select the color of each level. The default is gray.
When you move the mouse over an indention line, the tooltip will show the start of the structure.

The sample above shows the info for the green indention line.
Obvious when the code fits into the screen, it is simple to see that the green line belongs to #IF _XMEGA. But when there is a lot of code in the editor, and you can not see all of the code, it can be a big help.
Code Folding
This option activates so called Code Folding. Code Folding allows you to hide/fold portions of your code.

The screen shot above shows :
1 - The Sub DEMO is folded. So you only see Sub Demo in your code. To indicate that the sub is folded there is a marker at the end of the line (3 dots)
Another indicator is the + sign. This means that the node is folded.
2 - When you put the cursor above the marker, you get a hint with the folded text/code.
3 - The minus means that you can fold that node. When you click the - it will turn into a + and the code is folded.
This is how it looks when the node at (3) is clicked:

When folding code, all child code (all levels under the node) will be folded/unfolded as well.
A node is a point in your code that is part of a structure like sub/end sub , function/ end function, for/next, do/loop, while/wend. Remarks , Dim, Const and Config can also be folded.
When you press F11, the current SUB or FUNCTION will be folded/unfolded. The Editor menu also has options to fold/unfold all code.
When you want to fold code that normally would not fold you can use a trick. When you define a constant you can use this for code folding:
Const fold=1
#IF Fold
print "fold this"
print "end this too"
#ENDIF
Conditional compilation is used to fold the code.
Draw Indention Lines
This option will draw vertical indent lines for structures.

Drawing indention lines may result in slower screen painting. Errors in your code might result in wrong painting of the lines.
Options Environment Font

OPTION |
DESCRIPTION |
Background color |
The background color of the editor window. Choose a color that is the same as your background. In a white room, using white would be best for your eyes. |
Keyword color |
The color of the reserved words. Default Navy.
The keywords can be displayed in bold too. |
Comment color |
The color of comment. Default green.
Comment can be shown in Italic too. |
ASM color |
Color to use for ASM statements. Default purple. |
HW registers color |
The color to use for the hardware registers/ports. Default maroon. |
String color |
The color to use for string constants : "test" |
Variable color |
The color to use for variables. Default is black. |
User Function Color |
The color to use for user SUBS and FUNCTIONS. The default is fuchsia. |
Excluded Code Color |
The color to use for Excluded code (code not compiled because of conditional compilation). |
Dead Code Color |
The color to use for Dead Code. (code that is not used) |
Editor font |
Click on this button to select another font for the editor window. A good choice is Fixedsys. |
Use Monofont |
When checked and the selected font is a monofont the font will be drawn with monofont properties. Otherwise it will be shown as non monofont. Use this for compatibility with old bascom versions and fonts. |
Show Hidden Characters |
This option will show special characters in the editor. Special characters are characters such as CR and LF. And all characters with an ASCII value above 127. You can use this option to find odd characters in your code which could result in compilation errors. |
Override Windows Font |
This setting will override the Windows default font. You can select a font by clicking the IDE system font button. It is recommended to select a font like SEGOU UI, normal, 10 points. This font is used by all forms of the IDE. It is independent of the editor font. |
Big Menu Icons |
This option will use bigger icons for the IDE. The normal default size is 16x16. The bigger size is 32x32. This will give better images when you have a high resolution monitor setting. |
Options Environment IDE

OPTION |
DESCRIPTION |
Tool tips |
Show tool tips when hovering over form elements such as buttons. |
File location |
Click to select a directory where your program files are stored. By default Windows will use the My Documents path. |
Sample Location |
Click to select the folder where the SAMPLE files are located. They are either stored in a sub folder of the application, or in a folder under the Documents\MCS Electronics\BASCOM-AVR\samples folder |
Use HTML Help |
Chose between old help and CHM Help. CHM is the preferred help file. Since HLP is not supported under Vista, it is advised to switch to CHM/HTML Help. The HLP file is not distributed but using the UpdateWiz you can still download the HLP file. |
Code hints |
Select this option to enable code hints. You can get code hints after you have typed a statement that is recognized as a valid statement or function. |
Hint Time |
The delay time in mS before a code hint will be shown. |
Hint Color |
The background color of the hints. |
Allow multiple Instances |
Select this option when you want to run multiple instances of BASCOM. When not enabled, running a second copy will terminate the first instance. |
Auto save on compile |
The code is always saved when you compile. When you select this option, the code is saved under the same name. When this option is not selected, you will be prompted for a new filename. |
Auto backup |
Check this option to make periodic backups. When checked you can specify the backup time in minutes. The file will also be saved when you press the compiler button. |
History Backup |
This option creates a history backup of the source file each time you save it. When you Compile code, the active source will be saved too before compilation and hence it will create a history file as well. The history file is a version of the code saved in the HISTORY folder. This folder is located in the same folder as the main project. The file will be named <FILE>~yymmdd hhnnss.hst Where <FILE> is the original file name, and yymmdd is the date and hhNNss is the time. |
Auto load last file |
When enabled, this option will load the last file that was open into the editor, when you start BASCOM. |
Auto load all files |
When enabled, this option will load all files that were open when you closed BASCOM. |
Check for updates |
Select this option to check for updates when the IDE is started. |
Show TABS |
This option will enable/disable the TAB for multiple windows. While the TAB is convenient to switch between windows, it will also consume screen space. You can disable this option to get more screen space. |
Reset docking |
This will reset the dockable windows to the default position. |
Search Find Auto Complete |
This option can enable/disable the auto completion in the Find dialog. When it is active and you type some text, based on historical input, the text will be completed. This is not always desired and can be disabled. |
Language |
This will set the language in the main menu to the selected language. Not all listed languages are supported/translated yet. |
Clear Do not Ask |
Some messages have a 'do not ask again' option. To reset this and thus show the messages, you can click this button. |
Use New Parser |
When compiling a project, the main file is searched for some settings like $regfile, $hwstack, $swstack and $framesize. This information is passed to the compiler DLL. This search is fast but simple : it will not work correct when using directives such as : #IF someConditon $regfile = "m88def.dat" #ELSE $regfile = "m2650def.dat" #ENDIF The parser used for the code explorer is capable to get the information but requires more time because it will parse the entire project. So you have the option to choose the old method or the new method. In version 2087 the new parser is made default. It is good practice to start your project with the required info : $regfile = "yourmicro.dat" $hwstack=32 ' values shown as sample $swstack=32 $framesize=32
We recommend that you always use 'New Parser' since the old method will be disregarded in a future update. This does mean that your main project code always need to contain the most important settings : $REGFILE, $HWSTACK, $SWSTACK and $FRAMESIZE. These settings override the optional project configuration settings. A future version will not use the configuration file settings since it is best that these settings are stored in the code.
This setting is also required for the $PROGRAMMER directive. |
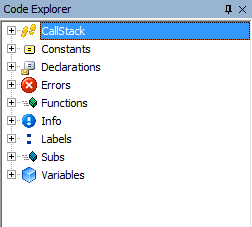
Code Explorer with separate INC files |
The Code explorer will put all elements in one tree without file names. Setting this option however will create a tree of elements with all file names under a branch named 'Inc Files'.
Code explorer with separate inc files Code explorer without separate inc files
|
Options Search

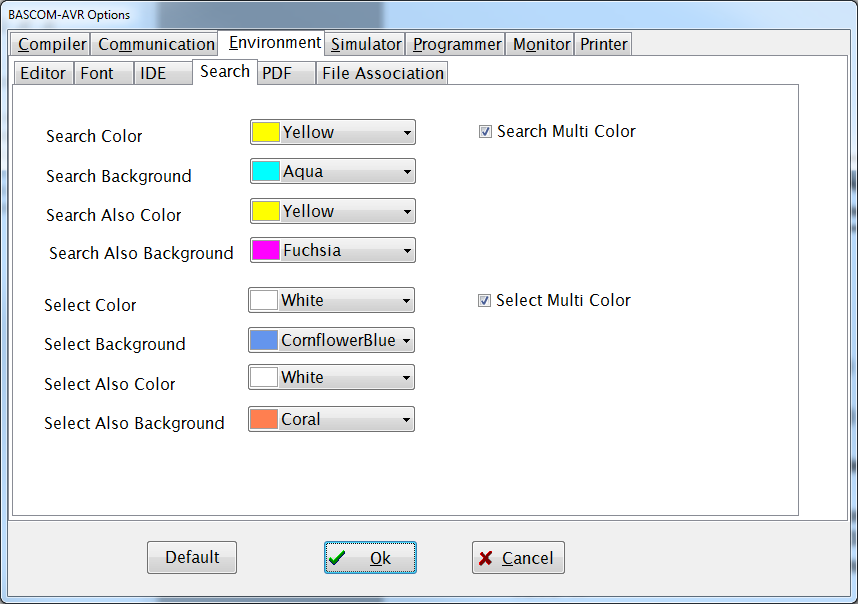
Using the Search and select options you can customize the search and select colors.
You can also enable the option : Search Multi Color and Select Multi Color.
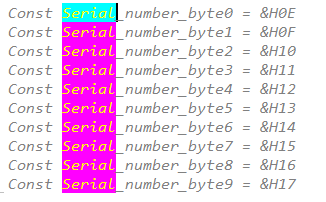
When search multi color is enabled all other matches will be highlighted too.

This sample shows what happens when you search for 'serial'. Note that that text is gray because of the 'Dead Code' option.

When you enable Select Multi Color, all text you select using the keyboard, mouse, or double click, will be highlighted the usual way. All other occurrences will be highlighted too.
This can be confusing.
The multi select coloring will do only what the name suggests : it will color the selecting text and all other occurrences. But when you perform an operation like replace, it will only be performed on the active selected text.
Options Environment PDF

OPTION |
DESCRIPTION |
Auto open processor PDF |
This option will automatic load the PDF of the selected micro processor in the PDF viewer. The $REGFILE value determines which data sheet is loaded. The PDF must exist otherwise it can not be loaded. |
Open PDF in new sheet |
Every time you change the value of the $REGFILE the processor PDF can be shown in the same sheet, or a new sheet can be shown with the PDF. A good option in case your project uses multiple processors. |
Auto save/load project PDF |
Load all PDF's when the project is opened that were loaded when the project was closed. |
Custom ShortCuts
When you want to define your own short cuts you can create an ini file named shortcuts.ini.
This ini file is just a text file you can create with notepad. Store this file in the BASCOM application folder.
To enable the user shortcuts you need to make an option named : ENABLED with the value -1.
This is an example of the default values
[MENU]
enabled=-1
FileNew=CTRL+N
FileSave=CTRL+S
FilePrint=CTRL+P
EditUndo=CTRL+Z
EditRedo=SHIFT+CTRL+Z
EditCut=CTRL+X
EditCopy=CTRL+C
EditPaste=CTRL+V
EditFind=CTRL+F
EditFindNext=F3
EditReplace=CTRL+R
EditGoto=CTRL+G
EditIndent=SHIFT+CTRL+I
EditUnIndent=SHIFT+CTRL+U
EditUnremarkBlock=CTRL+M
EditProperIndent=CTRL+ALT+P
Compile=F7
SyntaxCheck=CTRL+F7
ProgramShowResult=CTRL+W
ProgramSimulate=F2
ProgramSendToChip=F4
ProgramResetChip=SHIFT+F4
TerminalEmulator=CTRL+T
LCD_Designer=CTRL+L
LibManager=CTRL+I
BatchCompile=CTRL+B
ShowDevMng=CTRL+D
To turn the custom shortcuts off set the ENABLED to 0.

