The USB-ISP Programmer is a special USB programmer that is fully compatible with BASCOM's advanced programmer options.
Since many new PC's and especial Laptop's do not have a parallel programmer anymore, MCS selected the USB-ISP programmer from EMBUD.
The drivers can be downloaded from the MCS Electronics website.
Please download from http://www.mcselec.com/index.php?option=com_docman&task=doc_download&gid=204&Itemid=54
After downloading, unzip the files in the BASCOM-AVR application directory in a sub directory named USB.

When you connect the programmer, Windows (98, ME, 2000, XP) will recognize the new device automatically.

Then the Hardware wizard will be started :

Select 'No, not this time' and click Next, as there is no driver at Microsoft's web.
The Wiz will show :

You need to select 'Install from a list or specific location' and click Next.

You can specify the path of the USB driver. This is by default :
C:\Program Files\MCS Electronics\BASCOM-AVR\USB
Use the Browse-button to select it, or a different location, depending on your installation.
As the driver is not certified by Micros ft, you will see the following window:

You need to select 'Continue Anyway'. A restore point will be made if your OS supports this and the driver will be installed.
After installation you must see the following window :

After you press Finish you will see Windows can use the programmer :

In BASCOM , Options, Programmer you can select the new programmer now.

New models of the USB programmer allow to set the speed.
The USB-ISP programmer is very quick and supports all options that the Sample Electronics and STK200 programmers support. It is good replacement for the STK200.
When you use other USB devices that use the FTDI drivers, there might occur a problem. Manual install the drivers of these other devices, then install the USB-ISP driver.
USB-ISP on VISTA
For Vista and Vista 64, please follow the this installation description.

When connection the ISP-PROG I to your PC the following window will show up. Here I have to select the top selection: Locate and Install driver software (recommended)
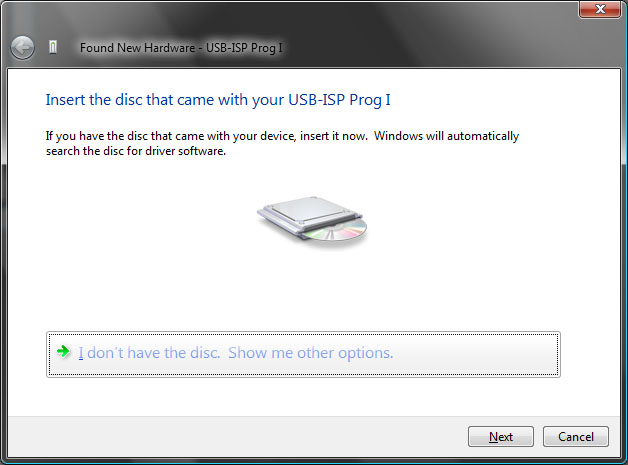
Vista starts it search for the driver and will come finally with the question to Insert the driver disk.

As we have no driver CD, you have to select: I don’t have the disc. Show me other options

Now we select the Browse selection and locate the driver folder.

And select Next button.
As Vista 64 only allows certified drivers the following message will pop-up.

Just select Install this driver software anyway and Vista 64 will now start with installing the driver. Be patient as it depends on your system configuration how long it will take.

Finally Vista 64 will tell you that the driver is installed. To check your configuration you can go to your device manager to see if it is there.
